How to Make (and Can) Plum Jam
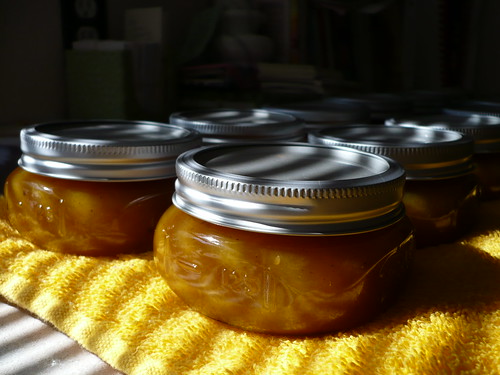
I made plum jam on Friday. It took me awhile – most of the afternoon – but now I have 12 shining jars of yummy jam! And most of the time spent was on preparing the plums. If you are working with regular-sized plums and not the cherry-sized ones that our tree made this year, I think it would take much less time. Also, this was only my second canning experience. That may have had something to do with it as well.
I had the hardest time finding a recipe for plum jam – nothing I found on the internet had anything concrete, and I didn’t have time to search through all my cookbooks or visit the library. So I kind of winged it. Well, not entirely — I did find some guidance on a few websites, but I added my own flair to that. Anyhow, seeing that there is such a dearth of plum jam recipes out there, I thought I’d post here about the process.
Here are the ingredients and tools you need (this should make about 6 half pint jars of Christmas Spice plum jam):
- about 3.5 lbs fruit
- 1/4 c Lemon juice (or “Fruit Fresh” – a vitamin c powder sold in the canning section)
- 1 box “no sugar needed” pectin
- 2 c sugar (you can add up to 3 c, or none, depending on sweetness desired)
- 3/4 c water (can use less or more depending on thickness desired)
- 1 teaspoon each cinnamon and nutmeg (optional)
- jars, lids, rings – jars and rings can be re-used, but the lids (the part w/ the gummy seal) can only be used once
- canning gadgets – canner pot, lid lifter, jar tongs, jar funnel – the magnetic lid lifter is not necessary, but useful. If you don’t have a canner pot, just use the largest pot you have, which would hopefully fit most of the jars you intend to fill. Place something in the bottom so that the water can circulate around the bottom of the jars – I read somewhere that you can even use flat stones, but I’m not sure about the source. I ended up using a turkey fryer – perfect!
- small pot to boil the lids
- large pot to boil your fruit (I actually used a smaller 2 quart pot, but almost boiled over a couple times)
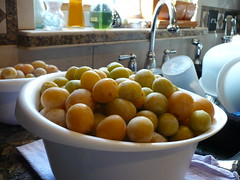
1) First, gather your fruit. I used about a gallon of plums for the two batches that I made – I think it weighed about 6.5 pounds, or maybe 7. I had to sort out some fruit that had gotten too squishy, but had the luxury of being able to step out my back door and pick more from the tree.
(Let me note here that having a plum tree just outside one’s back door sounds very dreamy and story-bookish, and actually is quite nice, until the fruit gets ripe and starts falling all over the concrete patio, creating a squishy path between the back door and garage. And then one’s cat becomes afraid to go out the back door during the daytime because of all the bees that congregate to feast on the fallen fruit. Also, the branches hang down so low with fruit all summer that no one can reach the back door without crouching nearly double. Not that I would know anything about that.)
2) Now is a good time to gather all of your tools and lay them out. Sterilize the jars (the dishwasher is fine for this – try to time it so that the jars are still warm when it’s time to use them – if you have a “heated dry” setting on your dishwasher, this is a good time to use it).
Sterilize the lids, too – at this point, I just got my pan of water ready so all I had to do when I was ready was turn the heat on. Or you can go ahead and bring the water to a boil for several minutes, and then just turn the heat down low until you need them.
Get the water bath ready in your canning pot – fill so that the jars you are using will be covered with at least 1 inch of water. Keep the water at a simmer while covered with lid.
3) Wash the fruit and sort it – this is the point where you decide what is too ripe or, as I like to put it, “squishy”.
4) Next, peel. Because their skin is so thick, plums really should be peeled. There is a super easy way to do this – prepare a bowl of ice water, and boil up some more water in another dish. Dip the plums into the boiling water for 30-60 seconds – you can use a metal colander for this, or just remove with a slotted spoon. Place them in the ice water to stop the cooking process. The skins should slide off fairly easily now!
5) Cut up the fruit. Cut out any brown or soft spots, remove pits, slice flesh into desired sizes. Place a metal spoon in a cup of ice water in preparation for step 9.
6) Add the lemon juice to the sliced-up fruit to keep the fruit from turning brown. Make sure all the surfaces are covered. I actually put the lemon juice in a bowl first, and added the fruit to the bowl as I cut it up – since the cutting process took me so long, this method worked pretty well for me.
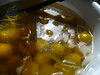
7) Add the spices, water, and pectin to the fruit, and bring the mixture to a full boil in your saucepan (make sure you have enough headroom so it doesn’t boil over!). You want the kind of boil that doesn’t go away when you stir it.
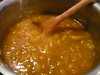
8) Add sugar to the boiling mixture. Continue the hard boil for 3 minutes, stirring constantly. Remove from heat.
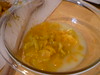
9) Test the set of your jam – using the ice-cold spoon that you prepared in step 5, get a spoonful of the hot jam mixture and cool it at room temp for a minute or so. (This is also a great opportunity to sneak a taste of your yummy jam in the name of “testing”.)
10) Fill the jars using the jar funnel. Clean the rims and place the lids on top, making sure that the rubber rim fits well on the jar. Screw the rings on until the fit is “fingertip tight”.
11) Place the filled jars into the canner. Put the lid back on, and bring to a boil. Boil for 5-10 minutes (there should be an “Altitude Chart” insert in the pectin box – mine said 10 minutes for 3,001-6,000 feet).
12) Remove jars from canner and set on a towel to cool overnight in a place where they won’t be disturbed.
Congratulations! You now have your very own shiny jars of yummy plum jam!
Let me know what you think in the comments, or if you have any tips that I missed. This website has quite a few good tips, on canning on on preserving in general. The insert that came in the box of pectin was also quite useful.


OOOH! I may have to come to your house to get some of that. Someone needs to try it!
— DESIREE Oct 2, 05:25 PM #thanks for this recipe! i just finished canning and hope all turned out all right. Question, does your pectin come with two packets as well? I was taken aback by the clumpiness of it and slowly came to the conclusion that more heat would take care of that, am i right?
— christina Sep 22, 11:14 AM #anyways thanks again!
Christina – I think I used the Ball brand of pectin . I made this recipe last year, and don’t remember if it was clumpy or not, but it sounds like you came to a good solution on your own :u) I’m so glad someone got to use this tutorial this year, since we were on vacation when our plums got ripe, and when we got back they were pretty much gone. So maybe next year. :u)
— Anna W Sep 30, 08:52 AM #I can tell you have put a lot of work into it. Good work!
— Edmonton Wedding Photographer Dec 3, 08:01 AM #Thanks for keeping people up on what’s happening.
— Nanaimo Dental Clinic Jun 2, 08:42 AM #I can tell you have put a lot of work into it. Posts are all wonderful.
— Kelowna Dentists Jun 23, 01:06 PM #Thanks for this yummy recipe Dear. Love ya
— AC Services Lahore PK Jul 15, 08:55 PM #Your air conditioning unit is a very important electrical part to cope up with this in the summer season. But when your unit breaks down you need quick and rapid repair services to get your system working in the best condition. We have trained our technicians who repair your Air conditioner unit at very economical rates.
— ServiceMarket May 27, 02:29 AM #We are providing you the technicians with the best equipment that makes our services of AC repairing the best of all. You can’t do it on your own because it can be too hard and frightening. Some things are only be deled by a trained and qualified technician.
The best services provided to you for repairing your AC are.
1: Change Air Filter
2: Drain Cleaning and Checking for Leakage
3. Purified Air
4: Increase Life Span Of Ac
5: Perfect Running System
6: Improve Ac Ability
Contact us:
https://servicemarket.pk/ac-repair-service/
+923214523184
[url=https://servicemarket.pk/ac-repair-service/]Ac Services in Lahore [/url]
— ServiceMarket May 27, 02:33 AM #That is an amazing and yummy recipe. Thanks for sharing.
— Places in Kumrat Valley Feb 20, 11:24 PM #This is the best way to get unlimited motivational videos status…
— Click Here Jul 23, 09:05 PM #